Have you ever wondered how to create those incredibly tender stews, perfectly crusted artisan breads, or succulent braised meats that seem to melt in your mouth? The secret often lies in one versatile piece of cookware: the Dutch oven. More than just a pot, it’s a culinary workhorse that can transform your cooking, bringing out rich flavors and achieving textures that are hard to replicate with other cookware. Whether you’re a seasoned chef or just starting your culinary journey, understanding the nuances of Dutch oven cooking can elevate your dishes from everyday to extraordinary.
What is Dutch Oven Cooking? Why It’s a Kitchen Essential
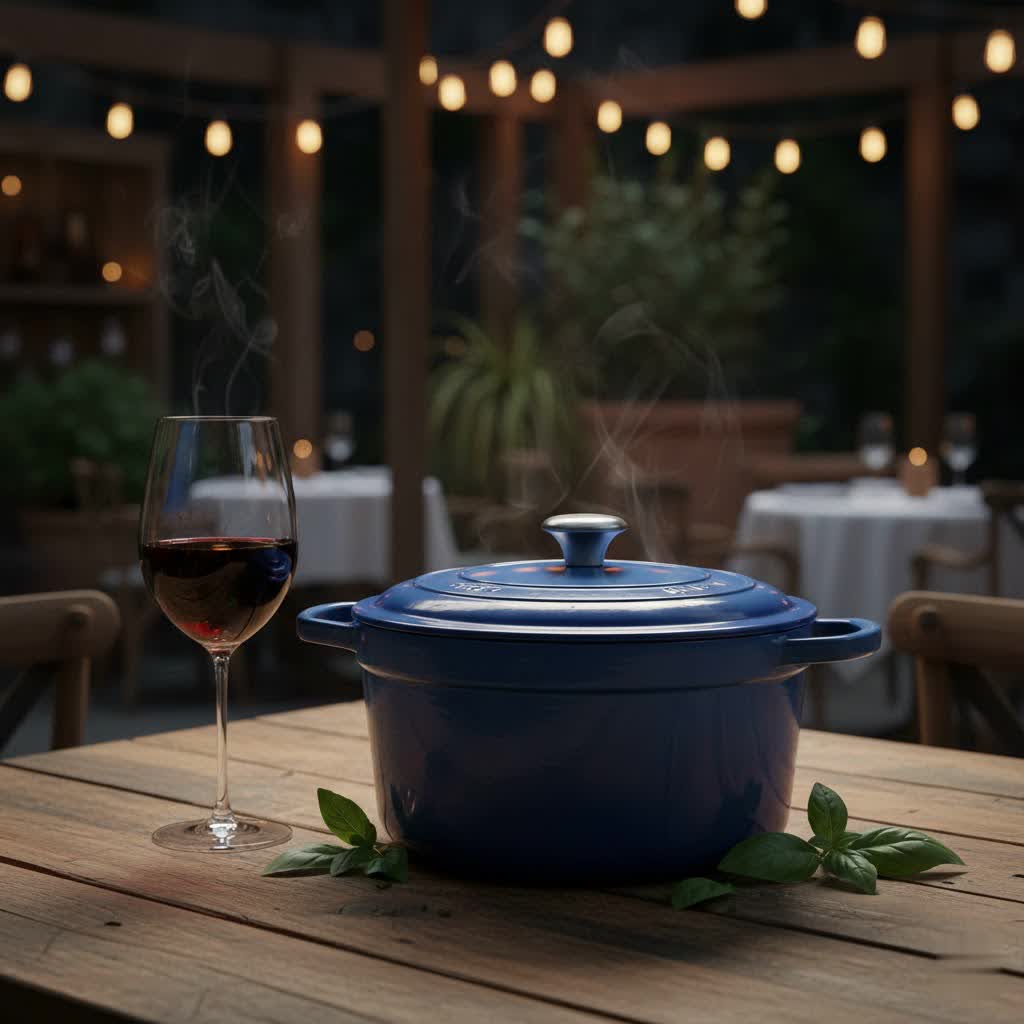
At its heart, a Dutch oven is a thick-walled, heavy-duty cooking pot with a tightly fitting lid, traditionally made from cast iron. Its design dates back centuries, with origins in the Netherlands (hence the name) and later popularized in America by figures like Paul Revere. The magic of Dutch oven cooking lies in its exceptional ability to retain and distribute heat evenly. This makes it ideal for a wide range of cooking methods, ensuring consistent results whether you’re simmering on the stovetop, baking in the oven, or even cooking over an open campfire.
The primary advantage of cooking with a Dutch oven is its unique thermal properties. The heavy material, usually cast iron, heats slowly but holds that heat for an extended period. This stable temperature environment is crucial for dishes that benefit from slow, gentle cooking, allowing flavors to meld and ingredients to tenderize beautifully. The tight-fitting lid plays an equally vital role, trapping steam and moisture within the pot. This self-basting action keeps food from drying out, resulting in incredibly moist and flavorful meals. From hearty one-pot dinners to delicate baked goods, a Dutch oven truly is a foundational tool for any aspiring home cook.
Types of Dutch Ovens: Choosing Your Culinary Companion
|
Our Picks for the Best Dutch Oven in 2026
As an Amazon Associate I earn from qualifying purchases.
|
||
| Num | Product | Action |
|---|---|---|
| 1 | Lodge 6 Quart Enameled Cast Iron Dutch Oven with Lid – Dual Handles – Oven Safe up to 500° F or on Stovetop - Use to Marinate, Cook, Bake, Refrigerate and Serve – Cranberry |

|
| 2 | Lodge 6 Quart Enameled Cast Iron Dutch Oven with Lid – Dual Handles – Oven Safe up to 500° F or on Stovetop - Use to Marinate, Cook, Bake, Refrigerate and Serve – Apricot |
|
| 3 | HomeVSS 5.5-Quart Enameled Cast Iron Dutch Oven with Lid & Dual Handles – Heavy-Duty for Bread Baking, Braising, Stews, Roasting, Oven & Induction Compatible, Orange |
|
| 4 | Lodge 6 Quart Enameled Cast Iron Dutch Oven with Lid – Dual Handles – Oven Safe up to 500° F or on Stovetop - Use to Marinate, Cook, Bake, Refrigerate and Serve – Cornflower Blue |
|
| 5 | Lodge 6 Quart Enameled Cast Iron Dutch Oven with Lid – Dual Handles – Oven Safe up to 500° F or on Stovetop - Use to Marinate, Cook, Bake, Refrigerate and Serve – Avocado |
|
| 6 | Lodge 6 Quart Enameled Cast Iron Dutch Oven with Lid – Dual Handles – Oven Safe up to 500° F or on Stovetop - Use to Marinate, Cook, Bake, Refrigerate and Serve – Blue |
|
| 7 | HomeVSS 5.5-Quart Enameled Cast Iron Dutch Oven with Lid & Dual Handles – Heavy-Duty for Bread Baking, Braising, Stews, Roasting, Oven & Induction Compatible, Blue |
|
| 8 | HomeVSS 5.5-Quart Enameled Cast Iron Dutch Oven with Lid & Dual Handles – Heavy-Duty for Bread Baking, Braising, Stews, Roasting, Oven & Induction Compatible, Red |
|
| 9 | Lodge 6 Quart Enameled Cast Iron Dutch Oven with Lid – Dual Handles, Oven Safe up to 500°F, Stovetop Compatible – Marinate, Cook, Bake, Refrigerate & Serve – Oyster White |
|
| 10 | Lodge 6 Quart Enameled Cast Iron Dutch Oven with Lid – Dual Handles – Oven Safe up to 500° F or on Stovetop - Use to Marinate, Cook, Bake, Refrigerate and Serve – Burnt Sienna |
|
Before diving into cooking techniques, it’s helpful to understand the different types of Dutch ovens available, as each offers unique benefits suited to various cooking styles. The two most common types are traditional cast iron and enameled cast iron, with aluminum options also existing for specific uses.
Traditional Cast Iron Dutch Ovens
These are the rugged, no-frills workhorses of the Dutch oven world. Made entirely of raw cast iron, they require seasoning – a process of baking on layers of oil to create a natural, non-stick surface and protect against rust.
- Advantages:
- Exceptional Durability: Built to last for generations, often becoming cherished family heirlooms.
- Superior Heat Retention: Ideal for deep frying, searing at high temperatures, and maintaining heat over long periods.
- Versatility: Can be used on stovetops, in ovens, over campfires, and on grills.
- Affordability: Generally less expensive than enameled versions.
- Disadvantages:
- Requires Seasoning: Needs regular maintenance to build and preserve its non-stick surface and prevent rust.
- Heavy: Can be cumbersome to lift, especially when full.
- Not Dishwasher Safe: Must be hand-washed and thoroughly dried immediately.
- Can React with Acidic Foods: Prolonged cooking of acidic dishes can strip the seasoning.
Enameled Cast Iron Dutch Ovens
These Dutch ovens feature a porcelain enamel coating over the cast iron, offering a beautiful aesthetic and easier maintenance. Brands like Le Creuset and Staub are well-known for their high-quality enameled options.
- Advantages:
- Easy to Clean: The smooth, non-porous enamel surface is naturally non-stick and much easier to wash.
- No Seasoning Required: Ready to use right out of the box.
- Non-Reactive: The enamel coating prevents acidic foods from reacting with the cast iron, preserving the food’s flavor and color.
- Aesthetically Pleasing: Available in a wide array of colors, making them suitable for serving directly from the oven to the table.
- Disadvantages:
- Prone to Chipping: The enamel can chip or crack if dropped or subjected to extreme thermal shock.
- Higher Price Point: Generally more expensive than traditional cast iron.
- Temperature Limitations: Should not be used over extremely high heat (e.g., direct campfire flames) as it can damage the enamel.
Aluminum Dutch Ovens
While less common for traditional “Dutch oven cooking,” aluminum versions exist, primarily for camping due to their lighter weight.
- Advantages:
- Lightweight: Much easier to transport for outdoor cooking.
- Heats Quickly: Aluminum is an excellent conductor of heat.
- Disadvantages:
- Poor Heat Retention: Does not hold heat as well as cast iron, leading to less consistent temperatures.
- Less Durable: More prone to denting and warping compared to cast iron.
Dutch Oven Comparison Table
| Feature | Traditional Cast Iron | Enameled Cast Iron | Aluminum |
|---|---|---|---|
| Heat Retention | Excellent | Very Good | Moderate |
| Durability | Extremely High | High (if cared for) | Moderate |
| Maintenance | Requires seasoning, hand-wash | Easy to clean, no seasoning | Easy to clean |
| Weight | Very Heavy | Heavy | Light |
| Reactivity | Reactive with acidic foods | Non-reactive | Non-reactive |
| Temperature Range | Very High (including open fire) | High (avoid extreme open fire) | Moderate |
| Price | Mid-range | High | Low |
Dutch Oven Cooking Methods: A Culinary Playground
The versatility of a Dutch oven is truly remarkable, allowing you to master a multitude of cooking techniques that yield delicious results. From slow-cooked comfort food to crispy fried delights, here’s how you can leverage your Dutch oven for diverse culinary creations.
Braising and Slow Cooking
This is where the Dutch oven truly shines. Its heavy construction and tight-fitting lid create an ideal environment for low-and-slow cooking. Braising involves searing meat (or vegetables) first, then cooking it slowly in a small amount of liquid, allowing the food to become incredibly tender and flavorful.
- Best for: Beef bourguignon, short ribs, pot roasts, hearty stews, chili, pulled pork.
- Tip: Start by searing your meat over medium-high heat on the stovetop to develop a rich crust, then add vegetables, liquids, and herbs before transferring to a low oven for hours. The long cooking time breaks down tough cuts of meat into succulent, fall-apart perfection.
Roasting
Whether you’re roasting a whole chicken or a substantial cut of meat, the Dutch oven acts like a mini oven, ensuring even cooking and a moist interior.
- Best for: Whole roasted chickens, leg of lamb, pork shoulder, large root vegetables.
- Tip: For crispy skin on poultry, you can start with the lid on for part of the cooking to trap moisture, then remove it for the last phase to allow the skin to brown and crisp up.
Baking
Believe it or not, a Dutch oven is fantastic for baking, especially artisanal bread. The enclosed, steamy environment mimics a professional bakery oven, creating a beautiful, crispy crust and a soft, airy interior.
- Best for: No-knead bread, sourdough, cobblers, biscuits, cakes, casseroles.
- Tip for Bread: Preheat your empty Dutch oven in the oven before adding the dough. The initial high heat and trapped steam are key to a great crust. For sweet baked goods like cobblers, placing more charcoal on the lid (for outdoor cooking) or ensuring good overhead heat (in a conventional oven) helps brown the top.
Frying
The thick walls and heavy bottom of a Dutch oven make it excellent for deep frying. It maintains a consistent oil temperature, which is crucial for achieving perfectly crispy results without making food greasy.
- Best for: Fried chicken, doughnuts, tempura, crispy vegetables.
- Tip: Fill the Dutch oven no more than one-third to halfway with oil to prevent boil-overs. Use a thermometer to monitor oil temperature closely, typically around 350°F (175°C). Fry in batches to avoid overcrowding, which can drop the oil temperature and lead to soggy food.
Sautéing and Searing
Before you braise or simmer, a Dutch oven is perfect for developing initial flavors. Its wide base provides ample surface area for browning ingredients.
- Best for: Searing meats, sautéing aromatics (onions, garlic), browning vegetables.
- Tip: Preheat the Dutch oven slowly over medium heat with a bit of oil or fat before adding ingredients. This ensures even searing and prevents sticking, especially important for non-enameled cast iron.
Boiling and Simmering
As a large, heavy pot, it’s ideal for boiling pasta, cooking grains, or simmering large batches of soup and stock. The excellent heat retention means your liquid will stay hot and come back to a boil quickly.
- Best for: Pasta dishes, rice, large batches of soup, stocks, poaching.
- Tip: Use the tight-fitting lid to bring liquids to a boil faster and reduce evaporation when simmering for extended periods.
Mastering Dutch Oven Cooking: Essential Tips & Tricks
Achieving culinary excellence with your Dutch oven involves understanding a few key principles. These tips will help you maximize its potential and ensure delicious outcomes every time.
1. Control Your Temperature
Temperature control is paramount, especially when cooking over an open fire or in older, less precise ovens.
- For Stovetop/Oven: Modern ovens and stovetops make this easier. Aim for consistent low-to-medium heat for most Dutch oven recipes to allow flavors to develop and prevent scorching.
- For Campfire Cooking: This is an art form. A general rule for baking at 325-350°F (160-175°C) is to use approximately twice as many charcoal briquettes as the diameter of your Dutch oven. Distribute them with about two-thirds on the lid and one-third underneath the pot. For example, a 12-inch Dutch oven might use 24 briquettes – 16 on top, 8 below. Rotate the pot and lid every 15-20 minutes to prevent hot spots. Adjust briquette count for higher or lower temperatures (add three briquettes for every 25°F increase).
- “You can cook food, but you can’t unburn food. Use less heat and cook longer rather than overheating.”
2. Always Start with Oil or Fat
Regardless of whether you have an enameled or traditional cast iron Dutch oven, always add a layer of oil, butter, or other fat before heating.
- Prevents Sticking: This is crucial for preventing food from sticking, especially when searing or sautéing.
- Protects Enamel: For enameled Dutch ovens, heating a dry pot can cause the enamel to crack or craze over time due to thermal stress. A protective layer of fat helps conduct heat more gently.
- Enhances Seasoning: For traditional cast iron, fat contributes to building and maintaining its natural seasoning.
3. Harness the Power of the Lid
The tight-fitting lid is a Dutch oven’s superpower.
- Traps Moisture and Steam: For braises, stews, and roasted dishes, keeping the lid on traps steam, creating a self-basting effect that keeps food moist and tender. It also builds internal pressure, accelerating cooking and tenderizing.
- Temperature Regulation: The lid helps maintain a consistent internal temperature, preventing drastic fluctuations.
- Multi-Purpose: Don’t be afraid to use an inverted lid as a temporary holding spot for seared meat or chopped vegetables, saving you an extra dirty dish.
4. Embrace Low and Slow Cooking
The Dutch oven truly excels at the “low and slow” approach. This method is not just about convenience; it’s about flavor development.
- Rich Flavors: Longer cooking times at lower temperatures allow ingredients to break down, release their full flavors, and meld together.
- Tender Textures: This is particularly beneficial for tougher cuts of meat, which become incredibly tender and juicy when cooked slowly.
- Patience is Key: Resist the urge to constantly lift the lid, as this releases precious heat and moisture, extending cooking times.
5. Avoid Drastic Temperature Changes (Thermal Shock)
This tip is especially critical for enameled Dutch ovens. Rapid changes in temperature can cause the enamel to crack or chip.
- Preheat Gently: Bring your Dutch oven up to temperature gradually, whether on the stovetop or in the oven.
- Cool Down Slowly: Allow the hot Dutch oven to cool down before washing it or adding very cold liquids. Avoid placing a hot pot directly into cold water.
6. Layer Ingredients Strategically
When cooking complex dishes with various ingredients, think about their cooking times.
- Heartier First: Ingredients that take longer to cook, such as root vegetables (carrots, potatoes) and tough cuts of meat, should be added earlier and closer to the heat source.
- Delicate Last: Quicker-cooking or delicate ingredients like fresh herbs, leafy greens, or seafood should be added towards the end to prevent overcooking and maintain their texture and freshness.
Popular Dutch Oven Recipes to Get You Started
With your newfound understanding of Dutch oven cooking, you’re ready to explore a world of delicious possibilities. Here are some classic categories that highlight the Dutch oven’s strengths:
- Hearty Stews and Soups: Think rich beef stews, flavorful chicken and dumpling soups, comforting lentil soups, or a spicy chili. The Dutch oven ensures deep, layered flavors and tender ingredients.
- Braised Meats: Dishes like succulent short ribs, fall-off-the-bone pot roasts, or fragrant lamb tagines are perfect candidates for slow braising, yielding incredibly tender results.
- Artisan Bread: Many home bakers swear by their Dutch ovens for achieving bakery-quality no-knead bread with a perfectly crisp crust and airy interior.
- One-Pot Pasta Dishes: The Dutch oven’s capacity and ability to retain heat make it ideal for cooking pasta dishes directly in their sauce, like creamy tomato pasta or beef goulash.
- Roasted Dinners: A whole roasted chicken with vegetables or a large cut of pork emerges wonderfully moist and flavorful from the Dutch oven.
- Comforting Desserts: From apple cobblers to bread puddings, the Dutch oven can bake desserts beautifully, especially when camping.
Caring for Your Dutch Oven: Longevity in Your Kitchen
Proper care is essential to ensure your Dutch oven remains a reliable cooking companion for years to come.
Cleaning
- Enameled Cast Iron: Typically easy to clean with warm, soapy water and a non-abrasive sponge. For stubborn stuck-on food, fill with warm water and a little dish soap, let it soak, then gently scrub. Avoid metal utensils or harsh scouring pads, which can damage the enamel. Always dry thoroughly to prevent water stains, especially on any exposed cast iron rims.
- Traditional Cast Iron: Avoid harsh soaps, which can strip the seasoning. Clean with hot water and a stiff brush or scraper. For stuck-on food, simmer water in the pot, then scrape. Immediately dry completely after washing (you can even place it on low heat on the stovetop for a few minutes to ensure it’s bone dry), then apply a very thin layer of cooking oil to the interior to protect the seasoning.
Seasoning Traditional Cast Iron
This is a continuous process. After cleaning and drying, apply a thin, even layer of high smoke point cooking oil (like flaxseed, grapeseed, or vegetable oil) to all surfaces. Wipe off any excess, then bake upside down in an oven at 450-500°F (230-260°C) for an hour. Let it cool in the oven. Repeat this process occasionally, or simply ensure you cook with oil/fat frequently.
Storage
Store your Dutch oven in a dry place. For enameled versions, you can place a paper towel between the pot and lid to prevent moisture buildup and chipping. For traditional cast iron, a paper towel also allows air circulation and absorbs any residual moisture.
Conclusion
Dutch oven cooking opens up a world of culinary possibilities, allowing you to create incredibly flavorful and satisfying meals with minimal effort. Its superior heat retention, even cooking, and moisture-trapping abilities make it an indispensable tool, whether you’re braising a hearty stew for a family dinner, baking artisan bread for breakfast, or cooking over an open fire beneath the stars. By understanding the different types of Dutch ovens and mastering a few essential techniques and care tips, you can unlock the full potential of this timeless piece of cookware. So, grab your Dutch oven and embark on your next delicious adventure!
What will you create first with your trusted Dutch oven?
Frequently Asked Questions
Can I use a Dutch oven on an induction cooktop?
Yes, most cast iron (both traditional and enameled) Dutch ovens are compatible with induction cooktops because they are made of ferrous metal. Aluminum Dutch ovens, however, will not work on induction cooktops unless they have an induction-compatible base.
What size Dutch oven is best for a family of four?
For a family of four, a Dutch oven with a capacity of 5 to 7 quarts (approximately 4.7 to 6.6 liters) is generally recommended. This size offers enough space for generous portions of stews, soups, roasts, and bread without being overly cumbersome to handle.