The aroma of freshly baked sourdough bread is one of life’s simple pleasures, but achieving that coveted crackling crust and airy interior at home can feel like a baker’s secret. Many find themselves yearning for the artisan quality loaves typically found in bakeries. The good news is, you don’t need a professional steam-injected oven to bake exceptional sourdough. The secret weapon for many home bakers is a simple yet powerful piece of cookware: the Dutch oven. This guide will walk you through why a Dutch oven is indispensable for sourdough, how to choose the right one, and a step-by-step process to bake your dream loaf.
Why a Dutch Oven is Essential for Sourdough Baking
The magic of baking sourdough in a Dutch oven lies in its ability to replicate the conditions of a professional baker’s oven. This heavy, lidded pot creates an ideal microclimate crucial for sourdough’s unique characteristics.
Steam Generation for Perfect “Oven Spring”
|
Our Picks for the Best Dutch Oven in 2026
As an Amazon Associate I earn from qualifying purchases.
|
||
| Num | Product | Action |
|---|---|---|
| 1 | HomeVSS 5.5-Quart Enameled Cast Iron Dutch Oven with Lid & Dual Handles – Heavy-Duty for Bread Baking, Braising, Stews, Roasting, Oven & Induction Compatible, Orange |

|
| 2 | Lodge 6 Quart Enameled Cast Iron Dutch Oven with Lid – Dual Handles, Oven Safe up to 500°F, Stovetop Compatible – Marinate, Cook, Bake, Refrigerate & Serve – Oyster White |
|
| 3 | Lodge 6 Quart Enameled Cast Iron Dutch Oven with Lid – Dual Handles – Oven Safe up to 500° F or on Stovetop - Use to Marinate, Cook, Bake, Refrigerate and Serve – Cranberry |
|
| 4 | Lodge 6 Quart Enameled Cast Iron Dutch Oven with Lid – Dual Handles – Oven Safe up to 500° F or on Stovetop - Use to Marinate, Cook, Bake, Refrigerate and Serve – Blue |
|
| 5 | Lodge 6 Quart Enameled Cast Iron Dutch Oven with Lid – Dual Handles – Oven Safe up to 500° F or on Stovetop - Use to Marinate, Cook, Bake, Refrigerate and Serve – Burnt Sienna |
|
| 6 | HomeVSS 5.5-Quart Enameled Cast Iron Dutch Oven with Lid & Dual Handles – Heavy-Duty for Bread Baking, Braising, Stews, Roasting, Oven & Induction Compatible, Blue |
|
| 7 | HomeVSS 5.5-Quart Enameled Cast Iron Dutch Oven with Lid & Dual Handles – Heavy-Duty for Bread Baking, Braising, Stews, Roasting, Oven & Induction Compatible, Red |
|
| 8 | Lodge 6 Quart Enameled Cast Iron Dutch Oven with Lid – Dual Handles – Oven Safe up to 500° F or on Stovetop - Use to Marinate, Cook, Bake, Refrigerate and Serve – Avocado |
|
| 9 | Lodge 6 Quart Enameled Cast Iron Dutch Oven with Lid – Dual Handles – Oven Safe up to 500° F or on Stovetop - Use to Marinate, Cook, Bake, Refrigerate and Serve – Apricot |
|
| 10 | Lodge 6 Quart Enameled Cast Iron Dutch Oven with Lid – Dual Handles – Oven Safe up to 500° F or on Stovetop - Use to Marinate, Cook, Bake, Refrigerate and Serve – Cornflower Blue |
|
When your sourdough dough is placed inside a hot, covered Dutch oven, the moisture naturally present in the dough turns into steam. This trapped steam performs a critical function: it keeps the crust from hardening too quickly during the initial baking phase. By remaining pliable, the crust allows the dough to expand rapidly and dramatically, a phenomenon bakers call “oven spring.” This powerful initial rise is what creates a light, airy crumb and an open structure within your loaf. Without sufficient steam, the crust would set too soon, restricting the dough’s expansion and resulting in a denser, flatter loaf with a less impressive crumb.
Unrivaled Even Heat Distribution
Cast iron, the primary material for most Dutch ovens, boasts exceptional heat retention and uniform heat distribution. This means the Dutch oven maintains a consistent high temperature around the entire loaf, ensuring every inch of the crust bakes to a deep, golden-brown perfection without a single burnt spot. The dense mass of the cast iron also radiates heat from the bottom up, which is crucial for achieving a well-cooked and sturdy bottom crust, preventing a soggy base.
The Power of Thermal Shock
A preheated Dutch oven is a non-negotiable step in sourdough baking. The pan acts as a heat-storage bank, absorbing and holding a tremendous amount of thermal energy. When the relatively cooler dough is carefully placed inside this searing-hot environment, it experiences an immediate, intense thermal shock. This sudden burst of heat further contributes to the impressive oven spring and kickstarts the crust development, resulting in that beautiful, classic crackle.
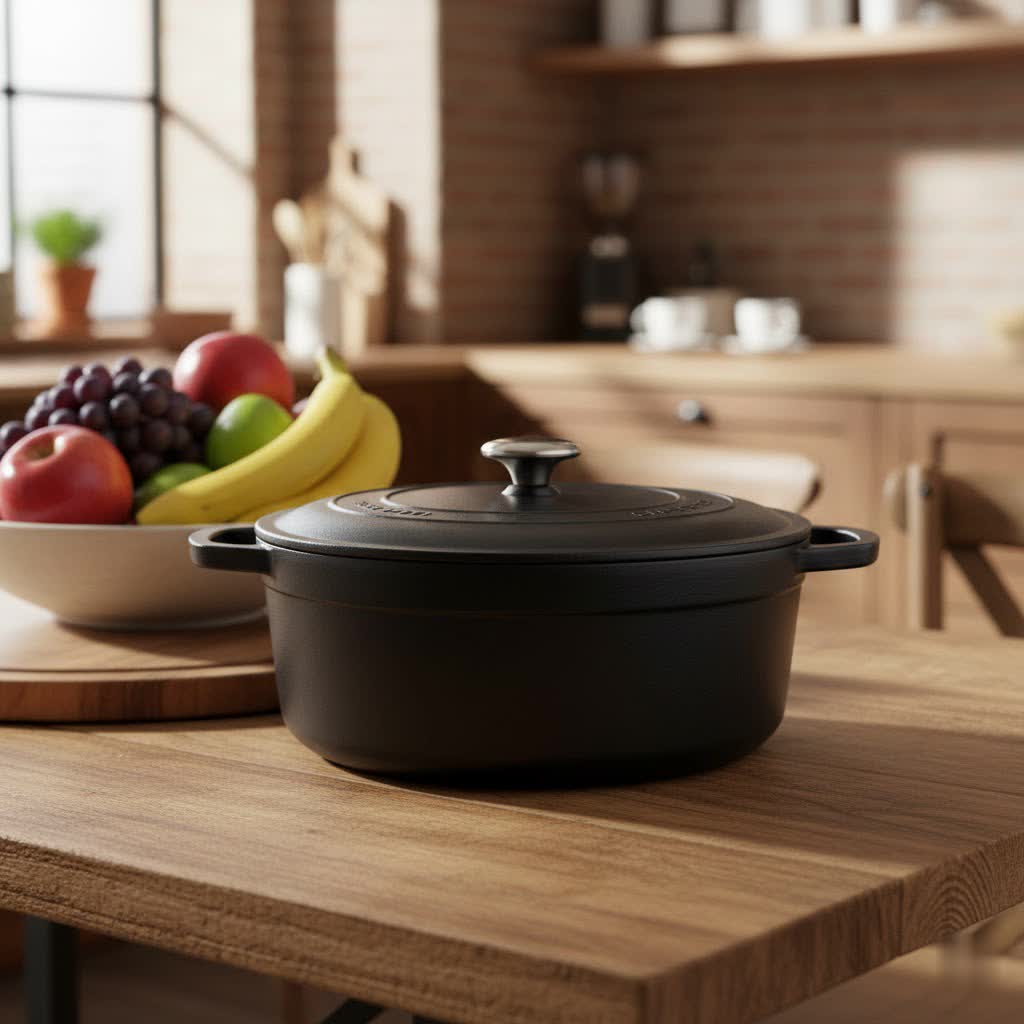
Choosing Your Sourdough Dutch Oven: A Comprehensive Guide
Selecting the right Dutch oven is key to your sourdough success. While many types exist, understanding their differences will help you make the best choice for your baking needs.
Materials: Cast Iron vs. Enameled
Dutch ovens are primarily made from cast iron, which can be either bare (raw) or enameled.
- Bare Cast Iron: These are rugged, durable, and excel at retaining heat. They can withstand extremely high temperatures, which is excellent for sourdough. However, bare cast iron requires seasoning to create a non-stick surface and prevent rust. It also needs careful maintenance, avoiding harsh soaps and always ensuring it’s dry and lightly oiled after cleaning.
- Enameled Cast Iron: This type features a glass-like coating over the cast iron. Enameled Dutch ovens are easy to clean, don’t require seasoning, and come in a wide array of colors. While highly functional, the enamel can chip or crack if subjected to extreme thermal shock or impact, and lighter interior colors may discolor over time from high-heat baking. They are generally more expensive than bare cast iron.
While other materials like aluminum or stainless steel exist, they are generally not recommended for sourdough due to their inferior heat retention and inability to create the necessary high-moisture, high-heat environment.
Size and Capacity
The size of your Dutch oven directly impacts your loaf’s shape and how well the steam is contained.
- For baking traditional round boules (typically made from 500g of flour), a 4- to 5-quart (4-5 liter) Dutch oven is ideal.
- For oval batards, a 5- to 7-quart (5-7 liter) oval Dutch oven is more suitable.
The depth is equally important; aim for at least 10-12 cm (4-5 inches) of internal depth to allow your sourdough loaf ample room for upward rise. A Dutch oven that is too small will restrict the dough’s growth and can cause indentations from parchment paper pressing against the loaf. Conversely, one that is too large might allow too much steam to disperse, reducing its effectiveness. A good test is to place your empty banneton inside the Dutch oven (when cold); if it fits with about an inch of space around the edges, your dough should fit too.
Shape, Lid, and Handles
Beyond size, consider the shape of your Dutch oven to match your preferred loaf shape (round for boules, oval for batards). A tight-fitting lid is paramount for trapping steam. Ensure that both the lid knob and handles are oven-safe to high temperatures, preferably made from brass or cast iron, as plastic components can melt.
Combi Cookers / Double Dutch Ovens
These versatile Dutch ovens feature a shallow skillet base and a deeper pot that serves as the lid (or vice-versa). They are popular for sourdough because the shallow base makes it easier to transfer dough, and when inverted, the sides of the loaf are more exposed, promoting even browning. Many combi-cookers are pre-seasoned bare cast iron, offering excellent value and multi-purpose use.
Affordable Options
You don’t need the most expensive Dutch oven to bake great sourdough. Many cheaper enameled options work perfectly well, although their enamel may craze or discolor more easily over time. Higher-quality Dutch ovens often have thicker walls, which can lead to better heat regulation and more consistent crust development. Regardless of price, always use parchment paper to prevent sticking and protect the enamel.
Step-by-Step: Baking Sourdough in a Dutch Oven
Follow these steps to transform your proofed sourdough dough into a golden, crusty masterpiece.
-
Preheating the Oven and Dutch Oven: Place your empty Dutch oven with its lid in the center of your cold oven. Preheat your oven to a high temperature, typically between 450°F and 500°F (230°C to 260°C). Allow the Dutch oven to preheat with the oven for at least 45 minutes to 1 hour. This extended preheating is crucial to ensure the cast iron is fully saturated with heat, providing the necessary thermal shock.
-
Preparing the Dough: While the oven and Dutch oven preheat, carefully remove your chilled sourdough dough from the refrigerator. Chilled dough is easier to handle and score, and it helps prevent over-proofing while you prepare for baking. Generously brush your sourdough loaf with 1-2 tablespoons of water and lightly dust it with flour. This helps create a glossy, crunchy crust. Using a sharp knife or a bread lame, score the top of your loaf with a quick, confident cut at a 45-degree angle. Scoring guides the dough’s expansion and creates a beautiful pattern.
-
Transferring the Dough: Don your high-temperature oven mitts. Carefully remove the searing-hot Dutch oven from the oven and place it on a heat-safe surface. Remove the lid. Using a piece of parchment paper as a sling, gently lower your scored dough into the hot Dutch oven. Ensure the parchment paper is not pressing into the dough, which could create indentations. Immediately replace the lid to trap the steam.
-
Baking (Lid On): Carefully place the covered Dutch oven back into the preheated oven. Bake for 20-30 minutes with the lid on. This initial phase is all about trapping steam, maximizing oven spring, and setting the crumb structure. Some recipes might suggest starting at 500°F for 20 minutes, then reducing the temperature slightly (e.g., to 475°F) before removing the lid.
-
Baking (Lid Off): After the initial covered bake, carefully remove the Dutch oven lid. Your loaf should have risen beautifully, and the crust will have begun to firm up. Continue baking for another 15-25 minutes, or until the crust is a deep, rich brown and reaches your desired level of crispness. This uncovered bake dries out the crust and develops its final color and crackle.
-
Cooling Completely: Once baked, carefully remove the loaf from the Dutch oven and immediately transfer it to a wire rack to cool. It is essential to let the bread cool completely—for at least one hour—before slicing. This allows the internal crumb structure to set properly and prevents the bread from becoming gummy.
Tips for Success & Troubleshooting
Even with the right equipment and method, a few extra tips can elevate your sourdough baking.
- Preventing Sticking: Always use parchment paper as a sling to lower your dough into the hot Dutch oven. This is the most reliable way to prevent sticking and makes transfer safer. Silicone bread slings are also excellent reusable alternatives. A well-seasoned bare cast iron pan or a light dusting of flour can also help, but parchment paper offers the most security.
- Bottom of Loaf Too Dark: If you consistently find the bottom of your loaf getting too dark, try placing a baking sheet or a baking stone on the oven rack directly beneath your Dutch oven. This acts as a barrier, diffusing some of the direct heat.
- Baking Multiple Loaves: If you only have one Dutch oven but want to bake multiple loaves, keep your proofed, unbaked loaves in the refrigerator. This slows down their fermentation, preventing over-proofing. Bake one loaf, then quickly reheat the Dutch oven for about 5 minutes before baking the next.
- Plastic Knobs: If your Dutch oven lid has a plastic knob that isn’t oven-safe to high temperatures, you can often remove it and cover the hole with aluminum foil, or purchase an oven-safe replacement knob made of metal or silicone.
Dutch Oven Care and Maintenance for Sourdough Bakers
Proper care ensures your Dutch oven remains a reliable companion for years of sourdough baking.
- Enamel Dutch Ovens: Hand washing is generally recommended for enameled Dutch ovens. The high temperatures required for sourdough can sometimes cause discoloration on lighter enamel interiors, which is often difficult to remove completely but doesn’t affect performance. For stubborn stains, a paste of baking soda and vinegar, a Magic Eraser, or Bar Keeper’s Friend (use with caution in certain sinks) can be effective. If your enameled pot has a bare cast iron rim, lightly oil it to prevent rust.
- Bare Cast Iron Dutch Ovens: If you dedicate a bare cast iron Dutch oven solely for bread baking, it may not need frequent washing. A simple wipe-out after use is often sufficient. To prevent rust, always ensure it is completely dry and lightly wipe it with a thin layer of cooking oil (like olive oil) after each cleaning or occasional use. Never put bare cast iron in a dishwasher, as this will strip its seasoning and lead to rust.
“The true magic of sourdough isn’t just in the starter, it’s in understanding how to harness heat and steam effectively. A Dutch oven provides the perfect stage for that transformation.” – Admin, reviewraudo.com, Dutch Oven Specialist
Conclusion
Baking sourdough bread in a Dutch oven is a transformative experience, unlocking bakery-quality loaves from your home kitchen. By harnessing the power of trapped steam and even, intense heat, this humble pot ensures superior oven spring, a perfectly crisp crust, and a delightfully airy crumb every single time. From selecting the right size and material to following precise baking steps and maintaining your cookware, each element contributes to a masterpiece. Embrace the process, and you’ll soon be enjoying the unparalleled satisfaction of truly artisan sourdough. What sourdough masterpiece will you create next?
Frequently Asked Questions
Do I really need to preheat my Dutch oven for so long?
Yes, the hour-long preheating is crucial. It ensures the cast iron is fully saturated with heat, which provides the intense thermal shock needed to create a massive “oven spring” and a perfect, crispy crust. Skipping this step will result in a less impressive loaf.
Can I bake sourdough in a cold Dutch oven?
While technically possible, baking in a cold Dutch oven is not recommended for optimal results. It will not trap moisture effectively or provide the instant blast of heat the dough needs for maximum oven spring and a well-developed crust, often leading to a denser loaf.
What is “oven spring” and why is it so important?
“Oven spring” refers to the final, rapid rise of the dough that occurs in the first few minutes of baking. It’s crucial for creating a light, airy crumb and an open structure in your sourdough. The trapped steam and intense heat from the Dutch oven are the primary drivers of this phenomenon.
How do I prevent my sourdough from sticking to the Dutch oven?
The most reliable method is to use parchment paper as a sling to lower your dough into the hot Dutch oven. A well-seasoned bare cast iron pan or a light dusting of flour can also help, but parchment paper offers superior non-sticking performance and easier transfer.
What if my Dutch oven has a plastic knob on the lid?
If your Dutch oven has a plastic knob, it will likely melt at the high temperatures required for sourdough baking. You can either remove the knob and cover the hole with aluminum foil or replace it with an oven-safe knob made of metal or silicone before baking.